Free Deer Stand Plans: DIY Blueprints to Build Your Own Stand (2026)
Free deer stand plans and DIY blueprints: build a ladder stand, elevated box tower blind, or hang-on platform with full material lists, step-by-step directions, costs, location tips, and the safety steps that matter.
As an Amazon Associate, Deer Hunting Success may earn from qualifying purchases.
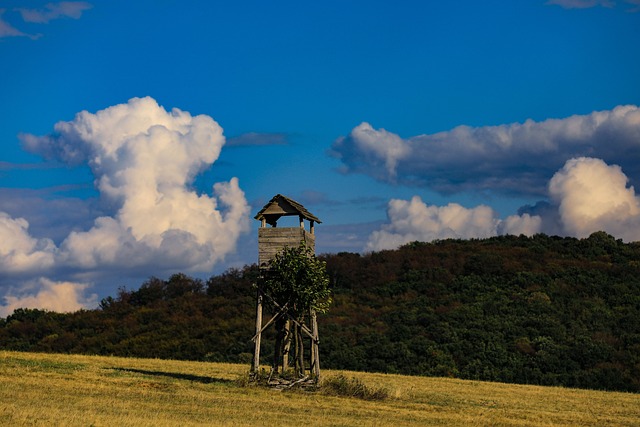
Free Deer Stand Plans: DIY Blueprints to Build Your Own Stand (2026)
Want to build a safe, sturdy deer stand without paying for pricey plans? This guide gives you free deer stand blueprints, material lists, and step-by-step builds for ladder stands, box tower blinds, and more.
📐 Free plans🪵 Full material lists🦺 Safety built in💵 Budget builds
Buying a deer stand can get expensive fast, and quality plans sometimes cost money too. The good news? You can build a rock-solid stand with free deer stand plans and materials from your local hardware store. Whether you want a comfy ladder stand, a warm elevated box blind, or a simple hang-on platform, this guide walks you through it all in plain English.
Below you will find free plan ideas for the most popular stand types, complete with material lists, step-by-step directions, cost estimates, and the safety steps that matter most. By the end, you will know exactly which stand to build, what it costs, and how to make it safe and long-lasting. Let us get you into a stand you built with your own two hands.
- Why build from a plan
- Types of deer stand plans
- Stand plan comparison
- What a good plan includes
- Tools and materials
- Plan 1: Ladder stand
- Plan 2: Box tower blind
- Plan 3: Hang-on platform
- Safety you cannot skip
- Common mistakes and fixes
- Pro tips
- Cost breakdown
- Best location
- How long it lasts
- FAQ
- Final checklist
Why Build a Deer Stand From a Plan
Building from a plan beats winging it, and it beats overpaying for a store stand. A good plan gives you a proven design, the right measurements, and a shopping list, so you avoid the guesswork that leads to a wobbly, unsafe stand. You also save real money. A DIY ladder stand or box blind often costs less than half of a comparable pre-built model, and you get exactly the size and features you want.
There is a durability bonus too. When you build it, you know every board and bolt, so you can make it stronger where it counts and repair it easily down the road. Pressure-treated lumber and quality hardware mean a stand that lasts many seasons in the weather. And because you control the design, you can tailor it to your land, whether that is a tall tower for a bean field or a compact box for a tight timber setup.
Finally, building your own stand is satisfying and safe when done right. You learn how the structure holds together, which makes you more likely to inspect it and trust it. Just remember that a homemade stand carries the same fall risk as any elevated stand, so safety gear and smart building are non-negotiable, as we will cover below.
Types of Deer Stand Plans
Ladder stand plans
A seat and platform on top of a fixed ladder, usually 10 to 16 feet tall. Ladder stand plans are beginner friendly, stable, and comfortable, making them a favorite for gun hunters and long sits. They lean against and strap to a solid tree.
Box tower blind plans
An enclosed box on legs or a tower, giving you a warm, hidden, weatherproof perch over fields and food plots. These are the most involved builds, but they are the most comfortable and the best for all-day hunts and taking kids.
Hang-on platform plans
A simple platform and seat you strap to a tree, reached with climbing sticks. Hang-on plans use the least material and are light and mobile, ideal for hunters who set several stands across a property.
Tripod and free-standing plans
A tower with a seat that stands on its own legs, perfect for open ground with no good trees. Free-standing plans take more lumber and bracing, but they let you hunt anywhere.
Ground box plans
A plywood box that sits on the ground, warm and simple, with no climbing at all. Great for those who prefer to stay at ground level or hunt with young or older companions.
Stand Plan Comparison
| Plan type | Difficulty | Cost | Best for | Comfort |
|---|---|---|---|---|
| Ladder stand | Medium | $80 to $180 | Beginners, gun hunters | High |
| Box tower blind | High | $300 to $700 | Fields, all-day sits, kids | Excellent |
| Hang-on platform | Low to medium | $40 to $120 | Mobile hunters, many sets | Fair |
| Tripod free-standing | High | $150 to $400 | Open ground, no trees | Good |
| Ground box | Low | $120 to $250 | No climbing, families | Excellent |
What a Good Free Plan Includes
Not all free plans are worth building. Before you cut lumber, make sure your plan checks these boxes. First, a complete material list with board sizes and quantities, so you buy the right lumber in one trip. Second, clear measurements and a diagram for every cut and joint, not just a vague sketch. Third, hardware details, meaning the exact bolts, screws, and straps that hold weight safely.
A quality plan also spells out safety features, like bracing, railings, and how to anchor the stand. If a plan skips safety, skip that plan. Look for designs that use pressure-treated lumber for anything exposed to weather and lag bolts or carriage bolts, not nails, at load-bearing joints. Good plans also note the recommended height and how to attach the stand to a tree or set the footings.
You can find free deer stand plans from extension services, hunting forums, and woodworking sites, and the three plans below give you a solid starting point. Whatever plan you choose, read it fully before buying materials, and adjust the size to fit your hunters and your spot.
Tools and Materials
Tools you will need:
- Cordless drill and impact driver
- Circular saw and a hand saw
- Socket set and wrenches for bolts
- Tape measure, speed square, and pencil
- Level and a ladder
- Safety glasses and gloves
Common materials:
- Pressure-treated 2×4, 2×6, and 4×4 lumber
- Exterior-grade plywood for platforms and box walls
- Carriage bolts, lag screws, and exterior wood screws
- Heavy-duty ratchet straps to secure the stand to a tree
- Metal brackets or angle iron for bracing
- Exterior paint or stain in flat, dark colors
Ratchet straps lock a ladder stand or hang-on tight to the tree so it never shifts, sways, or slips. Buy a rated, heavy-duty set and you get a safer, quieter stand that stays put season after season. Do not trust a homemade stand to a cheap strap.
- ✅ Locks your stand tight to the tree
- ✅ Stops sway that spooks deer and feels unsafe
- ✅ Weatherproof webbing lasts for seasons
- ✅ Easy to tighten and re-check each year
Our pick on Amazon: AUGO Heavy Duty Ratchet Straps, 4 Pack, 15 ftThe specs above describe what to look for. Check the listing for this model’s exact specifications and current price.
Price and availability on Amazon.com. This site may earn a commission.
Plan 1: Simple Ladder Stand
A ladder stand is the perfect first build. This plan makes a stable stand about 12 feet to the platform, with a seat and a shooting rail. Adjust the height and rail to fit you.
- Build the ladder. Use two long 2×4 rails and rungs spaced about 12 inches apart, bolted or screwed securely. Make the ladder in sections if it is tall, so it is easier to handle.
- Frame the platform. Build a small square frame from 2x4s, roughly 24 by 24 inches, and skin it with exterior plywood. Add a lip so gear does not slide off.
- Add the seat. Mount a simple bench seat at a comfortable height above the platform, braced underneath for strength.
- Attach a shooting rail. Add a padded front rail at chest height to rest your gun or bow and to give you something to lean against.
- Brace it all. Add diagonal braces where the ladder meets the platform so nothing racks or wobbles.
- Set and strap it. Lean the stand against a strong, straight tree and secure it top and bottom with heavy-duty ratchet straps.
- Test before you trust it. Have a helper hold the base while you climb and check for flex, then tighten everything.

Plan 2: Elevated Box Tower Blind
Once you are ready for a bigger project, an elevated box blind on a tower is the most comfortable stand you can build. You construct a 4×4 or 4×6 plywood box, then raise it on a braced tower of 4×4 or 4×6 posts, 6 to 10 feet up.
The tower is the safety-critical part. Set the posts in concrete or on solid footings, and cross-brace every side with diagonal boards so it cannot wrack or sway in the wind. Use lag bolts, not nails, wherever the box meets the tower. Build a strong ladder or stairs with a handrail for safe access, and add a landing platform at the door so you enter safely.
Frame the box with a sloped roof so rain runs off, cut quiet windows at seated eye level, paint the interior flat black to hide movement, and seal the roof with felt or a metal panel. Anchor the whole structure with ground anchors on exposed field edges. Done right, this blind will keep you warm, dry, and hidden for many seasons. For more detail, see our hunting blind plans and elevated box blind guide.
Plan 3: Hang-On Platform
If you want a light, mobile stand for cheap, a hang-on platform is the answer. This plan uses the least material and packs the biggest mobility punch, letting you set fresh spots as you find deer sign.
Build a small, strong platform frame from 2x4s, about 24 by 30 inches, and skin it with exterior plywood or expanded metal for grip. Add a sturdy strap bracket so you can cinch it to the tree with a ratchet strap and a support chain or bracket underneath for load. Keep it light but strong, and test it low to the ground before you ever hang it high.
Pair your platform with climbing sticks or screw-in steps and always use a lineman’s rope and lifeline as you climb and hang it. A hang-on is only as safe as your climbing method, so never rush the setup. For a deeper look, see our guide to hang-on tree stands.
Safety You Cannot Skip
A homemade stand carries the same danger as any store-bought one: falls. Most tree stand accidents happen while climbing up or down or getting in and out, and they are almost always preventable with the right gear and habits. Do not let a DIY build become a DIY accident.
Build it strong, then hunt it safe. A stand you built with your own hands still needs a full-body harness, a lifeline, and a careful climb every single time.
Always wear a full-body safety harness and stay connected to the tree from the moment your feet leave the ground. Use a lineman’s rope while you hang the stand and a lifeline for every climb after. Use quality hardware, not nails, at every load-bearing joint, and inspect straps, bolts, and wood for wear before each season. Never climb with a weapon; haul it up with a rope once you are secured. For a full walk-through, read our tree stand safety checklist and hunting safety guidelines.
Common Mistakes and Fixes
- Mistake: Using nails at joints. Fix: Use carriage bolts and lag screws at load-bearing points; nails work loose.
- Mistake: Untreated lumber. Fix: Use pressure-treated wood for anything exposed to weather so it does not rot.
- Mistake: No bracing. Fix: Add diagonal braces so ladders and towers cannot rack or sway.
- Mistake: Skipping the harness. Fix: Wear a full-body harness and use a lifeline every time.
- Mistake: Building too tall too soon. Fix: Start at a modest height and test everything low before going high.
- Mistake: No annual inspection. Fix: Check wood, bolts, and straps before every season and replace worn parts.
Pro Tips
- Pre-build in sections in your shop, then assemble in the woods to save time and noise.
- Paint or stain dark and flat so the stand blends and does not shine.
- Add a bow hanger and gear hook to cut movement while you hunt.
- Brush it in with nearby limbs to soften the outline.
- Set stands early, weeks before season, so deer accept them and you climb in daylight.
- Keep spare hardware on hand so a loose bolt never cancels a hunt.
Cost Breakdown
| Item | Rough cost | Notes |
|---|---|---|
| Pressure-treated lumber | $40 to $150 | Varies by stand size |
| Plywood | $30 to $120 | Platform or box walls |
| Bolts, screws, brackets | $20 to $50 | Use quality, rated hardware |
| Ratchet straps | $15 to $40 | Heavy-duty, rated |
| Full-body harness | $40 to $120 | Never skip this |
| Paint or stain | $15 to $30 | Flat, dark colors |
| Typical total | $120 to $500 | Ladder stands are cheapest, towers most |
Best Location for Your Homemade Stand
Even a perfect build fails in the wrong spot, so plan your location before you sink posts or strap in. Set stands along the routes deer already travel between bedding and food: field edges, inside timber lines, pinch points, creek crossings, and the corners of food plots. You want to be close enough for a clean shot but far enough that you do not bump deer coming and going.
Hunt the wind above all. Position your stand so your scent blows away from where deer travel and bed, and be honest that a great spot on the wrong wind is a bad spot that day. Pick a tree or tower site with a little cover behind you so you are not skylined, and clear just a few quiet shooting lanes rather than a big obvious hole. For permanent builds like a box tower, choose the location carefully, because you will not move it easily once it is set.
Whenever you can, set your stand weeks before you plan to hunt it. Deer notice new objects, and a stand that has sat for a month gets ignored while a fresh one gets stared at. Early setup also means you climb and adjust in daylight, which is far safer than fumbling in the dark on opening morning. See our guide to selecting a successful tree stand location for more.
How Long Will a DIY Deer Stand Last?
A homemade stand built with the right materials can last a decade or more, which is one of the biggest reasons to build your own. The key is using pressure-treated lumber for anything exposed to weather, exterior-grade plywood, and rust-resistant hardware. Cheap untreated wood and bare steel fasteners are what turn a good stand into a rotten, unsafe one after just a season or two.
Weather is the enemy, so protect your build. Seal box blind roofs with felt or a metal panel, paint or stain exposed wood, and keep water from pooling on platforms. Even so, plan to inspect every stand before each season. Check the wood for soft spots and cracks, tug on every bolt and bracket, and replace any strap that shows fraying or sun damage. A five-minute inspection can catch the one weak point that matters.
Treat your stand like the life-safety equipment it is, and it will reward you with many safe, comfortable seasons. Retire and rebuild any stand you no longer fully trust; lumber and hardware are cheap compared to a fall. Build it well, maintain it yearly, and your DIY stand becomes a fixture of your hunting property for years to come.
Frequently Asked Questions
Where can I find free deer stand plans?
You can find free plans from state extension services, hunting forums, woodworking sites, and guides like this one. Look for plans with a full material list, clear measurements, hardware details, and safety features. Always read the whole plan before buying lumber and adjust the size to fit your setup.
What is the cheapest deer stand to build?
A hang-on platform uses the least material and is the cheapest to build, often under $120 plus climbing sticks. A simple ladder stand is next. Ground boxes and box tower blinds cost more but offer more comfort and weather protection.
What wood should I use for a deer stand?
Use pressure-treated lumber for anything exposed to the weather, since it resists rot and lasts many seasons. Use exterior-grade plywood for platforms and box walls, and fasten load-bearing joints with carriage bolts and lag screws rather than nails.
How tall should a homemade deer stand be?
Most DIY ladder stands and box blinds sit 10 to 16 feet high, and elevated towers often 6 to 10 feet. Higher lifts your scent and view but steepens shots and adds risk. Match the height to your cover and always prioritize a safe, stable build.
Is it safe to build your own deer stand?
Yes, if you build it strong and hunt it safe. Use quality hardware, brace everything, follow a solid plan, and inspect it yearly. Then wear a full-body harness and use a lifeline every time you climb. A well-built, well-inspected stand is as safe as any store model.
Can I move a homemade deer stand?
Hang-on platforms and ladder stands can be moved, though ladder stands are heavy and awkward. Box tower blinds and free-standing tripods are semi-permanent and are best left in a good spot. Plan your location carefully before you build a permanent stand.
Final Checklist
- ☑️ Chose a plan with a full material list and safety features
- ☑️ Used pressure-treated lumber and exterior plywood
- ☑️ Fastened load joints with bolts and lag screws, not nails
- ☑️ Braced ladders and towers so nothing racks or sways
- ☑️ Secured the stand to the tree with heavy-duty ratchet straps
- ☑️ Painted or stained dark and flat, then brushed it in
- ☑️ Bought a full-body harness and lifeline
- ☑️ Tested the stand low before trusting it high
- ☑️ Set it up weeks before season, in daylight
- ☑️ Planned an annual inspection of wood, bolts, and straps
Free deer stand plans put a safe, sturdy, custom stand within reach of any hunter with a drill and a weekend. Start with a ladder stand or ground box, use quality lumber and hardware, and never cut corners on safety. Build it right and you will hunt from it proudly for years. Pick your plan and start building. 🪵🦌
Related reads: build your own tree stand, hunting blind plans, tree stands guide, and tree stand safety checklist.