

A food plot soil analysis is an absolute necessity for a successful planting.
It is easy, quick and cheap to get it done. Most of the labs charge around $5 to $10 per soil sample.
The soil analysis will tell you exactly what the soil needs for you to successfully grow your intended planting. The lime and fertilizer recommendations are normally provided for 3 years.
There are several nutrients that are essential for plant growth. A soil test is used to determine the amount of these nutrients in the soil.
The soil test results are subsequently used to make a soil test report. In addition to indicating the level of nutrients in your soil, the report will also tell you the pH value or how acidic or basic your soil is, and it will make a recommendation for the amount and type of fertilizer and/or lime you need to add to the soil for optimum plant growth.
This allows you to customize your soil fertilizer and lime applications to your plants’ needs.
Following the recommendations of your food plot soil analysis will help prevent problems with nutrient deficiencies (in the case of under-fertilization) or problems associated with over-fertilization such as excessive vegetative growth, delayed maturity, salt burn and wasted money.
Soil pH
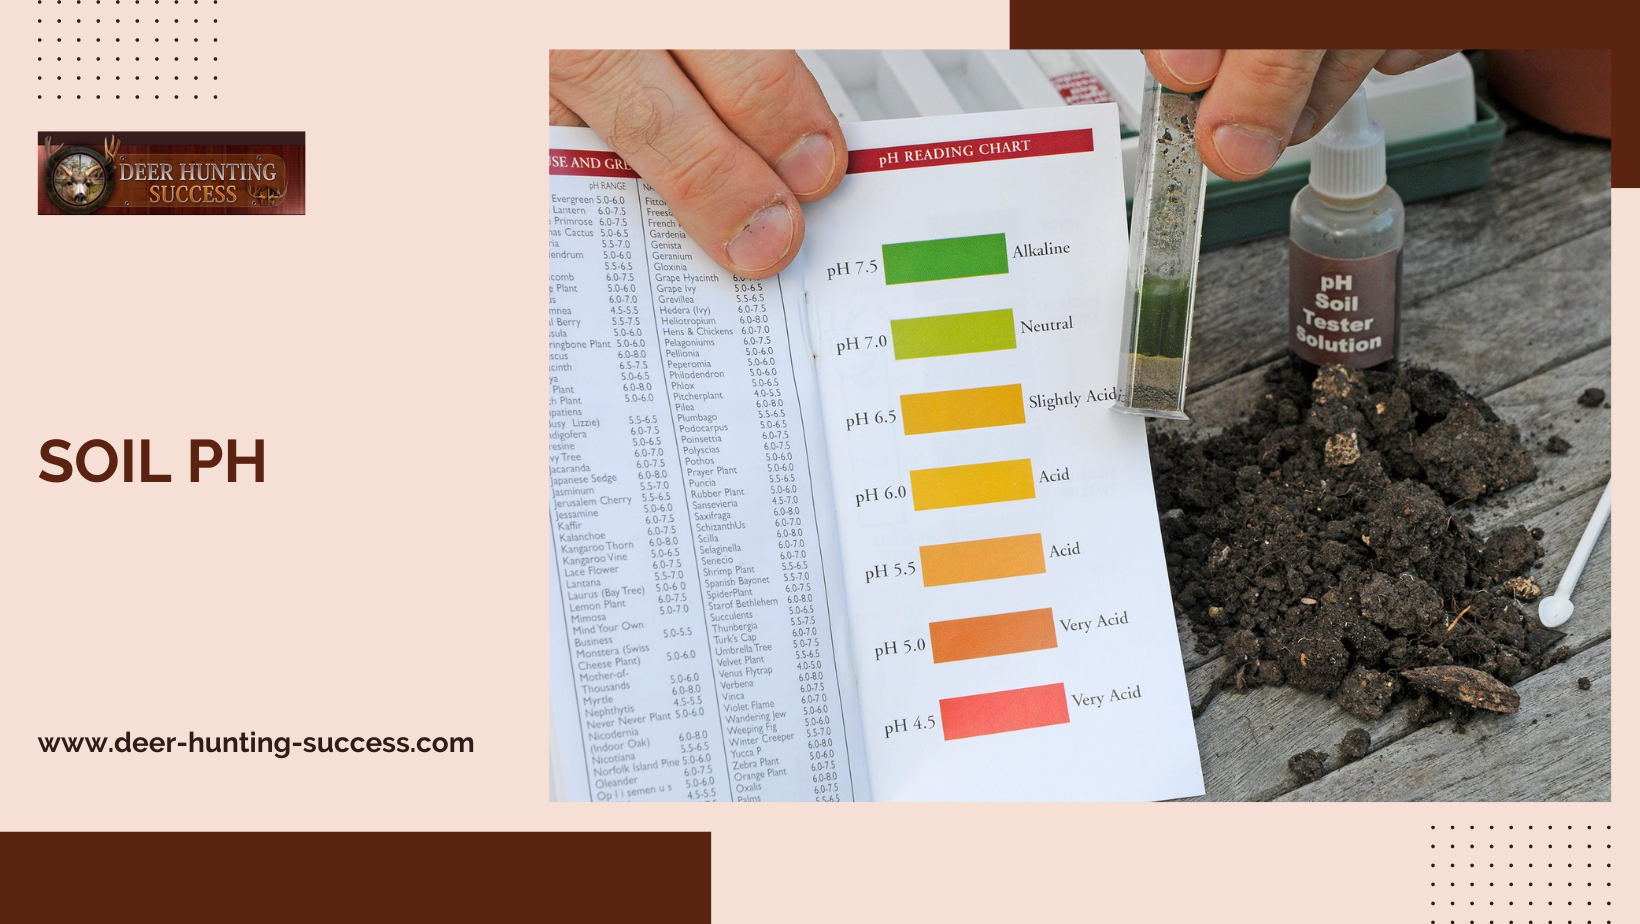
Soil pH is a measure of how acidic or alkaline your soil is. Soil pH directly affects nutrient availability.
The pH scale ranges from 0 to 14, with 7 as neutral. Numbers less than 7 indicate acidity, while numbers greater than 7 indicate an alkaline soil.
Plants thrive best in different soil pH ranges.
To make soils less acidic, the common practice is to apply a material that contains some form of lime. Ground agricultural limestone is most frequently used.
The finer the limestone particles, the more rapidly it becomes effective. Different soils will require a different amount of lime to adjust the soil pH value.
The texture of the soil, organic matter content and the plants to be grown are all factors to consider in adjusting the pH value. For example, soils low in clay require less lime than soils high in clay to make the same pH change.
Read More: How to Choose the Correct Tree Stand
Nutrients
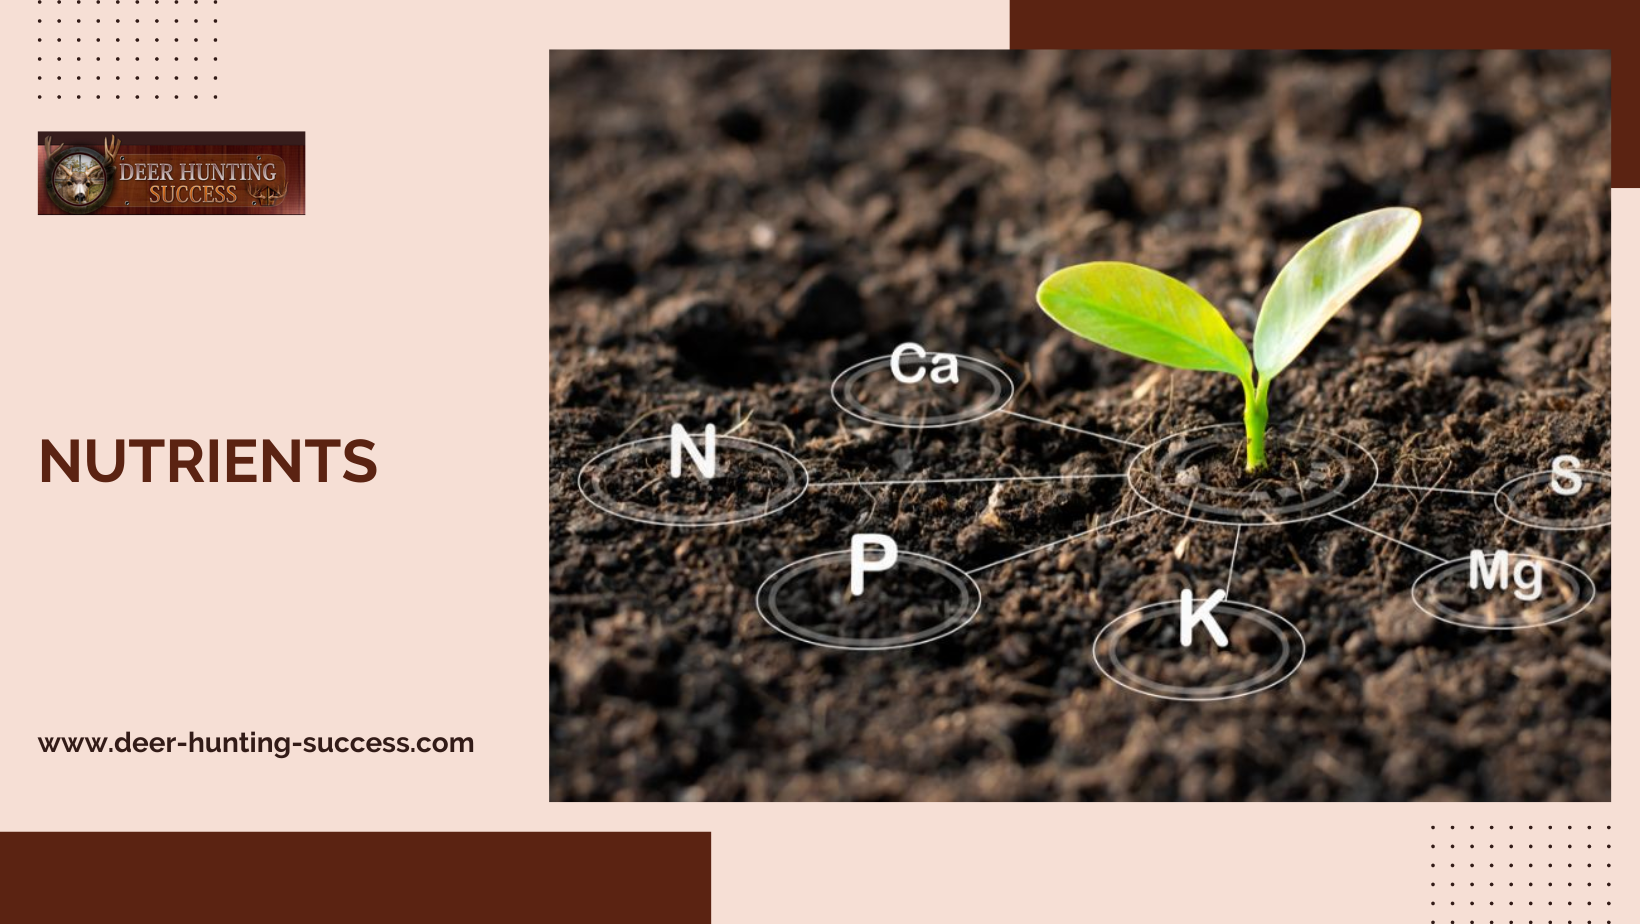
Nutrients for healthy plant growth are divided into three categories: primary, secondary and micronutrients.
Nitrogen (N), phosphorus (P) and potassium (K) are primary nutrients, which are needed in fairly large quantities compared to the other nutrients.
Calcium (Ca), magnesium (Mg) and sulfur (S) are secondary nutrients which are required by the plant in lesser quantities but are no less essential for good plant growth than the primary nutrients.
Zinc (Zn) and manganese (Mn) are micronutrients which are required by plants in very small amounts. Most secondary and micronutrient deficiencies are easily corrected by keeping the soil at the optimum pH value.
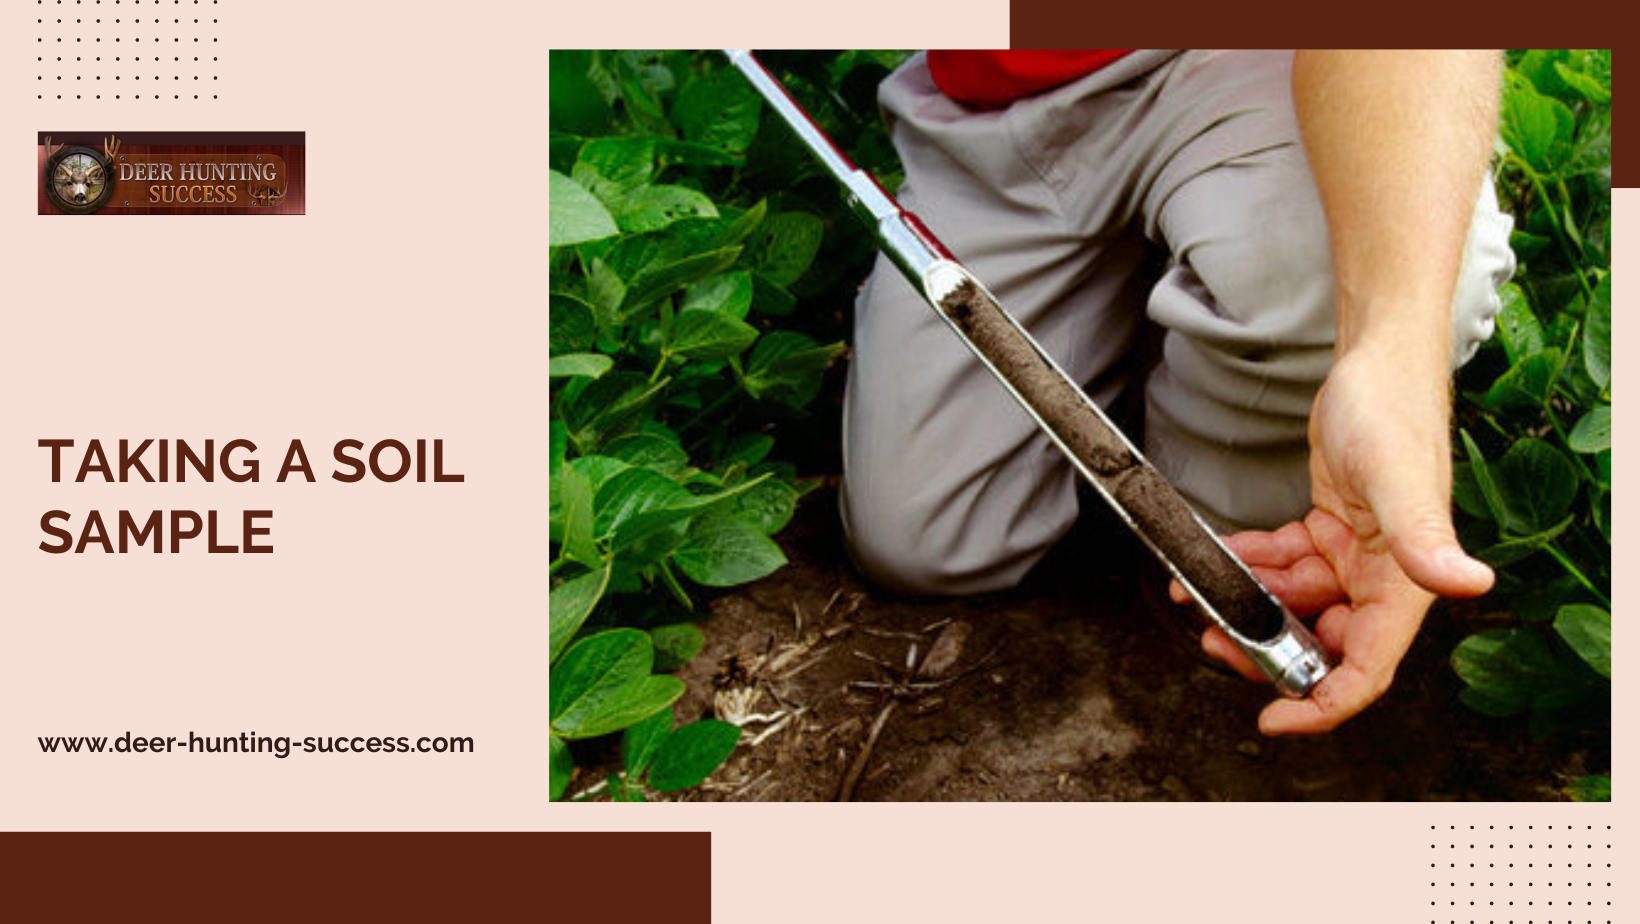
Taking a Soil Sample
The best time to take soil samples is in the summer as the labs are usually very busy in the winter and spring, and you may have delays getting your results. Some seeds need to be planted as early in the spring as you can use the ground.
Remember once you get your soil results you will want to plan what to plant, organise liming and fertilizer, and allow about 6 months for the lime to break down and be absorbed by the soil and allow the nutrients to work.
To take soil samples, select about 10 locations spread all around your intended plot area.
Head out to those locations with a large Zip-Loc bag and a shovel.
- When you get to each location, use the shovel to clear all plants etc down to the bare soil over an area of about a square foot.
- Push the shovel into the ground 8-10 inches. Withdraw the shovel and push it in again the same distance about 1 inch behind the first cut. This time use the shovel to lift out the 1inch thick slab of soil.
- Using the side of the shovel, cut a 1 inch square of the 8-10 inch slab and then place this 1″ x 1″ x 8″ sample into the plastic bag.
- Repeat this procedure at all the other locations.
- Once you have returned from your intended plot location, spread out all the soil on the newspaper and use your hands to break up lumps and mix the soil.
- Let the soil air dry for a couple of days.
- Put the soil into the lab sample bags from the soil test kit, and add the required information. This information will include your personal details, as well as what is currently growing in the intended plot location, as well as what you intend to plant there.
If you have more than one food plot location, you would need to complete a separate soil test for each food plot.
When the computer printout of your soil analysis arrives, it will tell you all about your soil, including the amount of lime and fertilizer you will need to add to your soil.
Read More: Hunting Locations
Related Links:
- https://en.wikipedia.org/wiki/Food_plot /By Wikipedia
- https://en.wikipedia.org/wiki/Seed_drill /By Wikipedia
- https://en.wikipedia.org/wiki/Soil_test /By Wikipedia
- https://en.wikipedia.org/wiki/Soil_mechanics /By Wikipedia
- https://www.wikihow.com/Do-a-Home-Soil-Test /By Wikihow
- https://www.wikihow.com/Take-an-Accurate-Soil-Sample /By Wikihow
- https://www.wikihow.com/Test-Soil-pH /By Wikihow